Considering donating if you found my post helpful 😊

Clipboard and folder sharing are usually an important feature to have when we run virtual machines. So here am I sharing the complete guide for you guys.
I found people talking about Qemu/KVM on Reddit, so I decided to try. Main reason why I wanted to try because I want to move away from VirtualBox that I can never enable folder sharing, and VMWare which is paid.
I am currently running Ubuntu 20.04 as the Host and Windows 10 as the Guests.
Problems
It is quite confusing when you first started. I started with virt-manager and had no clipboard sharing enabled. By default, virt-manager is using SPICE. The key to this tutorial is, install spice-guest-tools and Spice WebDAV daemon.
Notes
I am writing this tutorial based on virt-manager. It should be working for any SPICE remote viewer too such as Cockpit (tested).
Solution – Clipboard sharing
(Updated as 26th Oct)
Step 1 – Download spice-guest-tools to Windows Guest
Open the download page (https://cutt.ly/2ROq8dK) on your Windows Guest, scroll down a bit until you found Windows binaries under Guest, click the Windows guest tools link to start the download. Or you can use this link
https://www.spice-space.org/download/windows/spice-guest-tools/spice-guest-tools-latest.exe

Or easier, shortened URL: https://cutt.ly/SROqBqZ

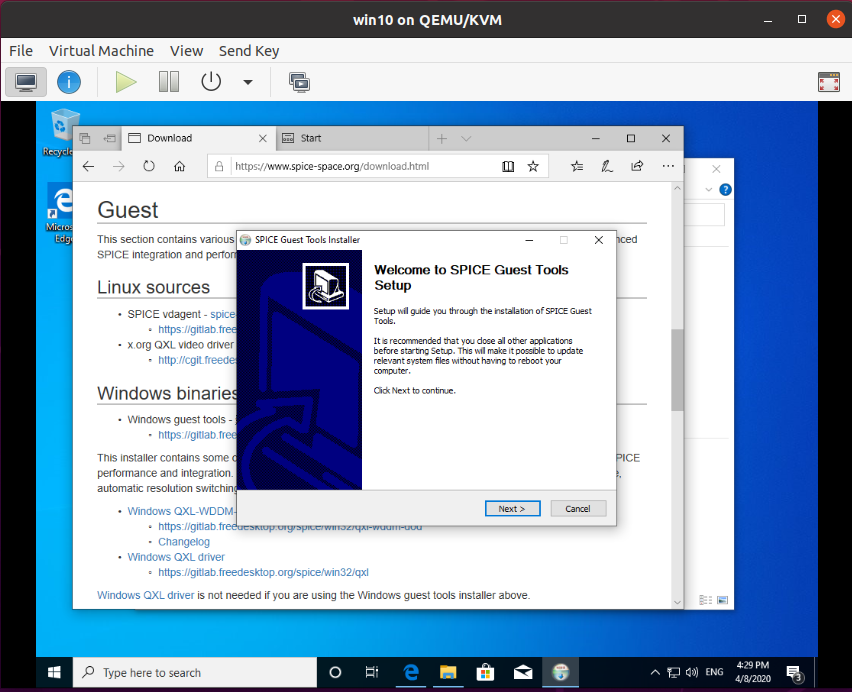
Step 2 – Run and install spice-guest-tools
After the file is available on your Windows Guest, run and install the program.
The display might blinking a few times, so don’t worry about that.
Step 3 – Test your copy/paste
You are pretty much finished. Try copying something in your Windows Guest and paste it in your Host, it should work. But if it doesn’t, try rebooting the VM. If it still won’t work, remove the program and reinstall. It should be working.
Solution – Folder sharing
(Updated as 26th Oct)
So, you have clipboard sharing enabled and now want to share folder?
We will be using virt-manager and Cockpit
Unfortunately, virt-manager has not implemented SPICE WebDAV in its client. So, we are going to use Cockpit, the alternative.
Step 1 – Install Cockpit and Cockpit Virtual Machines
First, install Cockpit and Cockpit Virtual Machines. For Ubuntu, run
Ubuntu: $ sudo apt install cockpit cockpit-machines
Arch: $ sudo pacman -Sy cockpit cockpit-machines
If you are using another Linux distribution, refer this page. You will still need to install cockpit-machines using your package manager to enable Virtual Machine manager.
Then enable and start cockpit
$ sudo systemctl enable cockpit.socket
$ sudo systemctl start cockpit.socket
Step 2 – Open the Web-UI in your browser
Cockpit provides Web-UI which you can access to use the program. Simply open this URL in your browser
http://localhost:9090
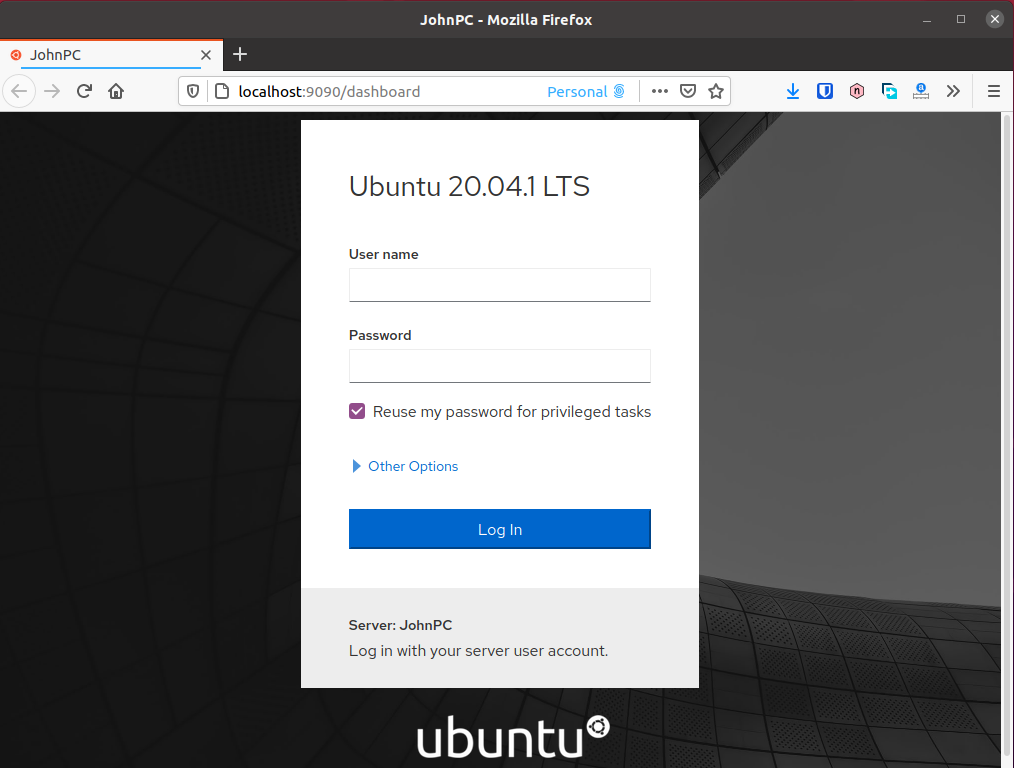
Login using your PC user and username
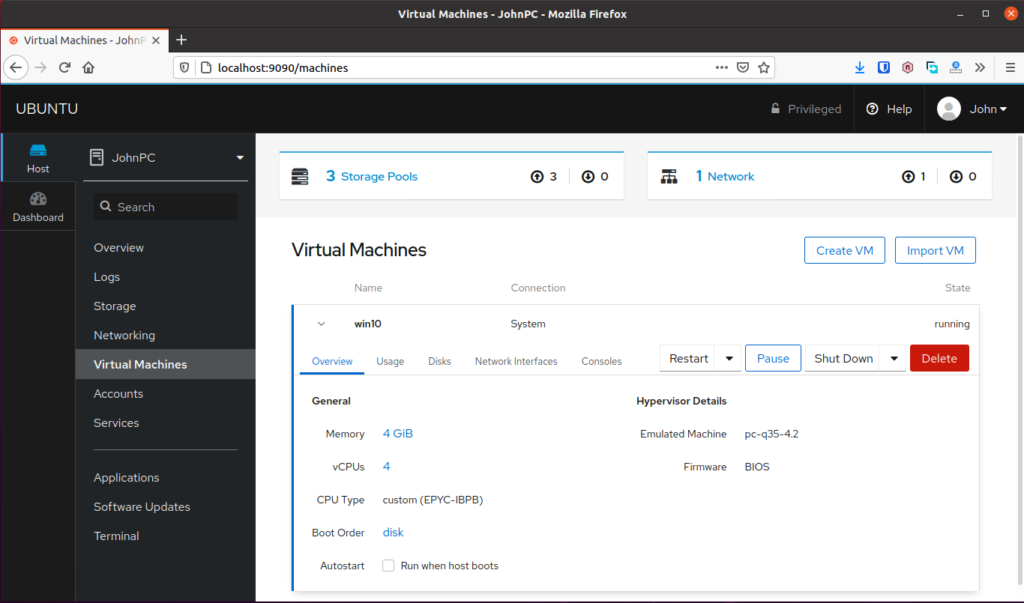
Step 2 – Go to Virtual Machine and shutdown your VM
You need to shutdown your VM or your settings in the next few steps probably won’t work. Simply go to Virtual Machines and hit the Shut Down button to turn off the VM.
Notes: If your Virtual Machine is empty, go to Overview and check if there is a notification at the top asking for a permission. Allow the access and your VMs should be showing up.
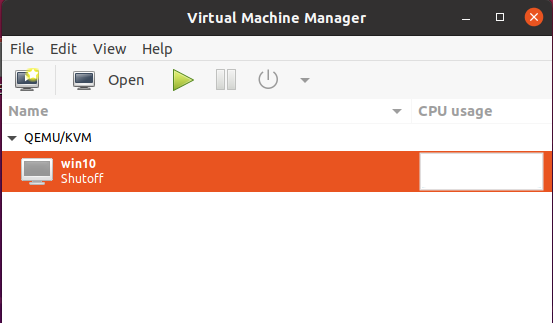
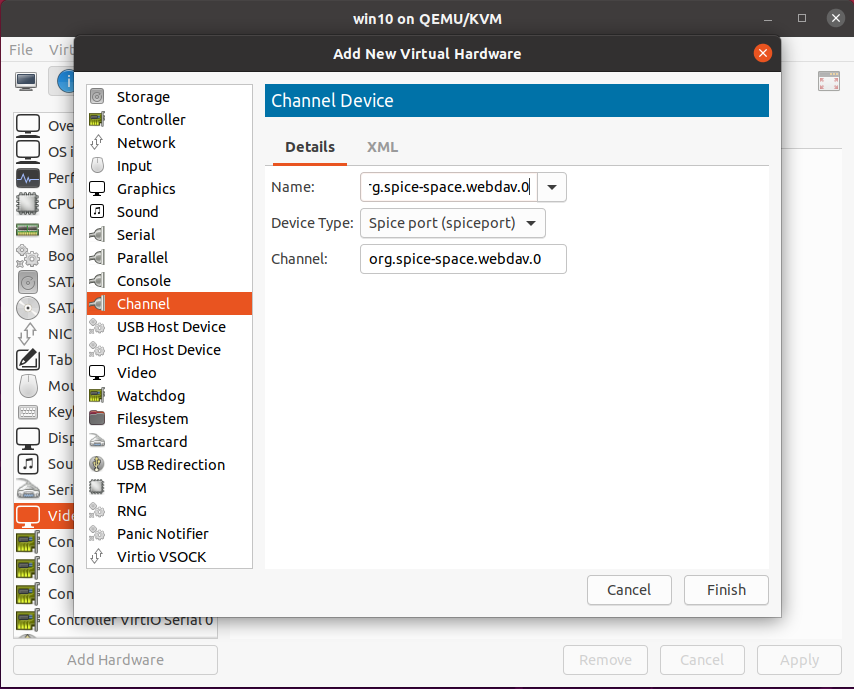
Step 3 – Open virt-manager, add new hardware
Open your virt-manager, right click on your VM and select open. You can also click on your VM, then hit the big “Open” button at the top.
Click Add Hardware and select Channel. Delete whatever in “Name” column, and insert this
org.spice-space.webdav.0
Step 4 – Return to Cockpit Web-UI, run your VM
You don’t need virt-manager for now, so you can close it. Then return to Cockpit Web-UI and hit Run button to start your VM.
Then go to Consoles tab and click “Launch remote viewer”
Notes: You probably need to install Remote Viewer if you are not on Ubuntu. On Arch, Install virt-viewer.
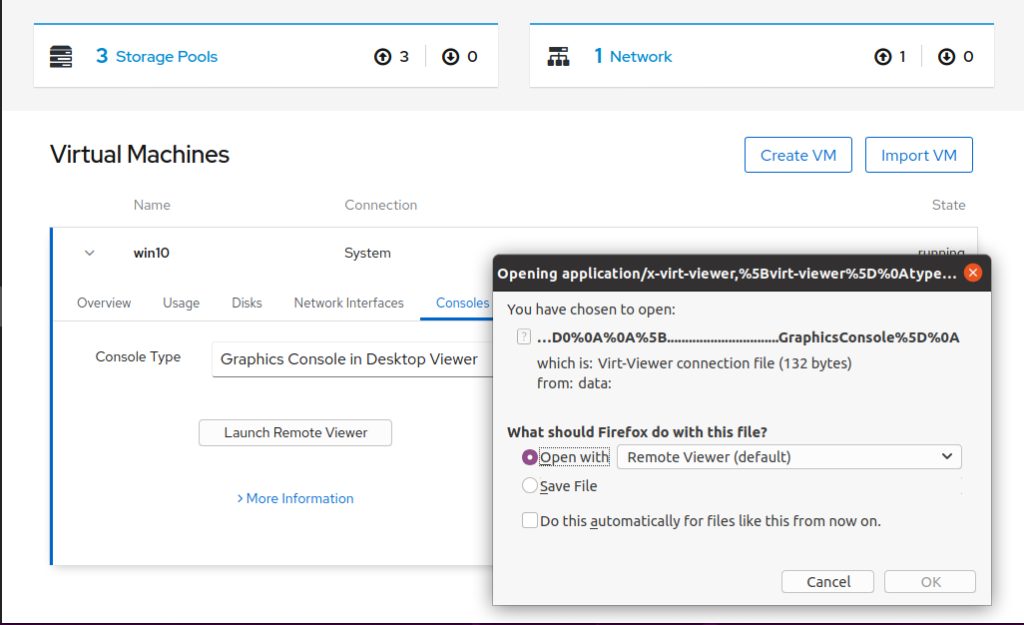
Click “OK” and you will see your Windows Desktop.
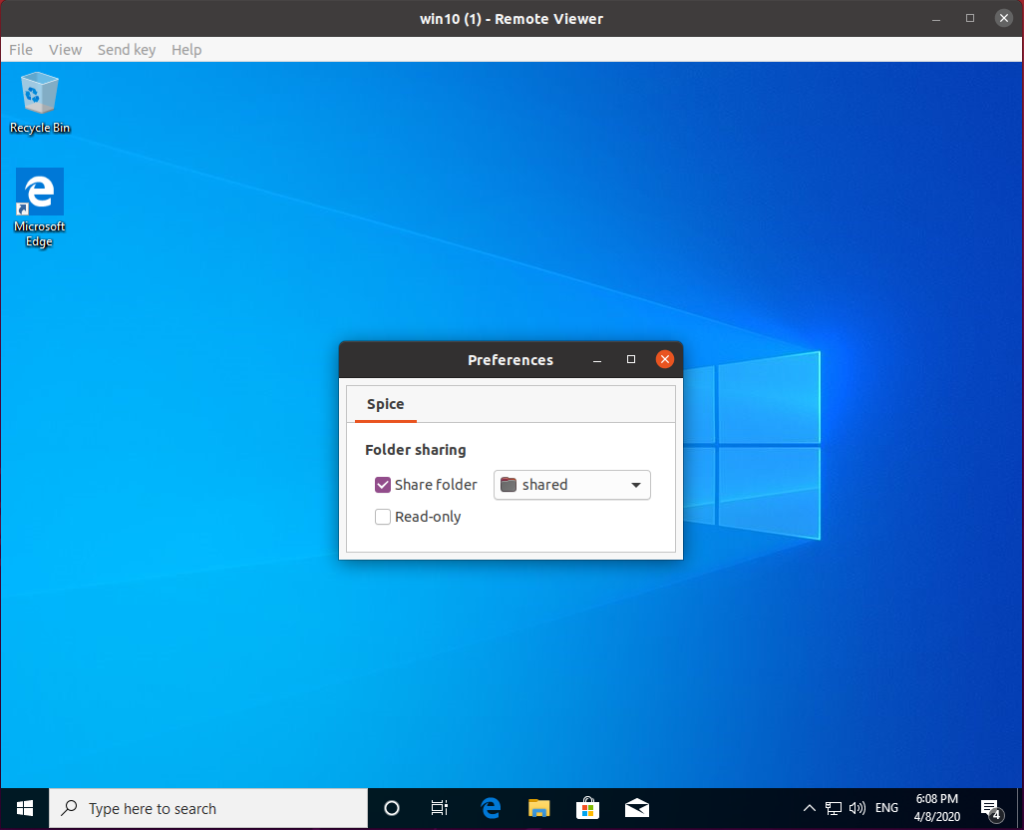
Step 5 – Enable Folder Sharing
Click menu File, then select Preferences. tick “Share Folder” and choose which folder you want to share with the Guest.
Notes: On Arch, Preferences is in hamburger menu on the right.
Download and install spice-webdavd in Windows Guest. Pay attention on the file extension. You will want to donwload .msi file which usually larger than the other. Or you can just use this link for the latest installer
https://www.spice-space.org/download/windows/spice-webdavd/spice-webdavd-x86-latest.msi

Be aware, some browsers will open the link instead of downloading it. At least Edge displaying the file content to me instead of downloading it.

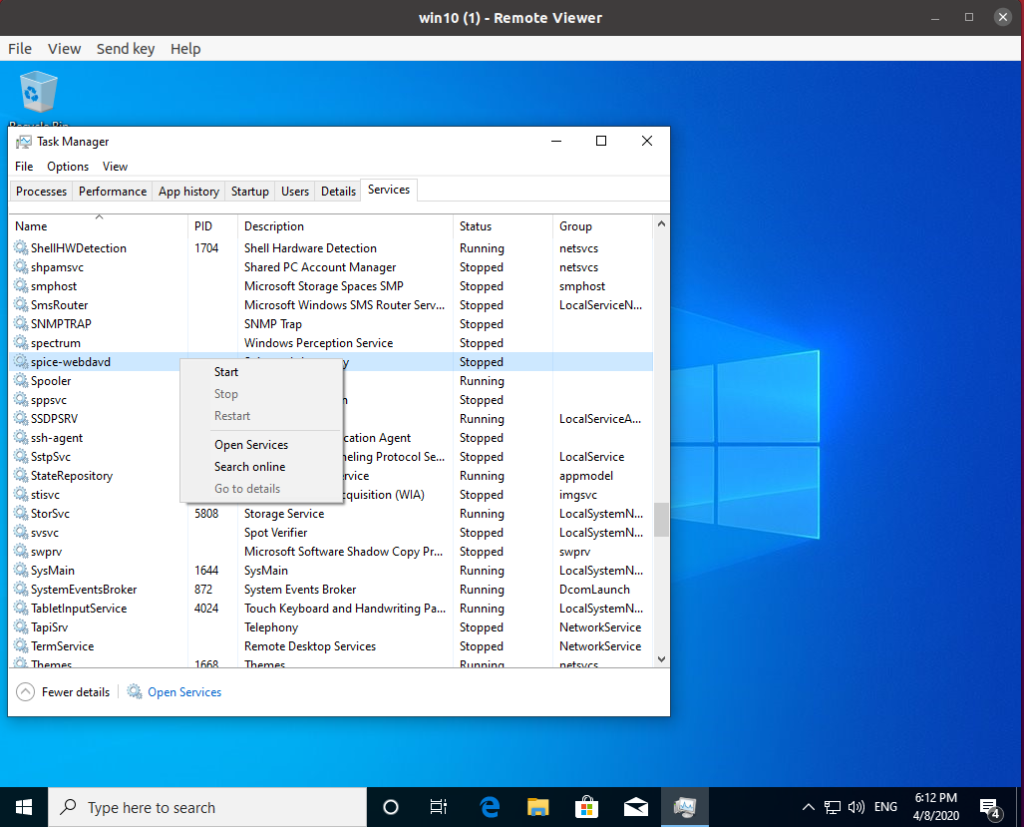
Then in the Windows, open Task Manager and go to Services tab. Find “spice-webdavd” and start the process if it doesn’t.
Step 7 – Verify the Folder Sharing is working
After running the “Spice webdav proxy” service, you should see a new storage in “This PC” or “My Computer”.
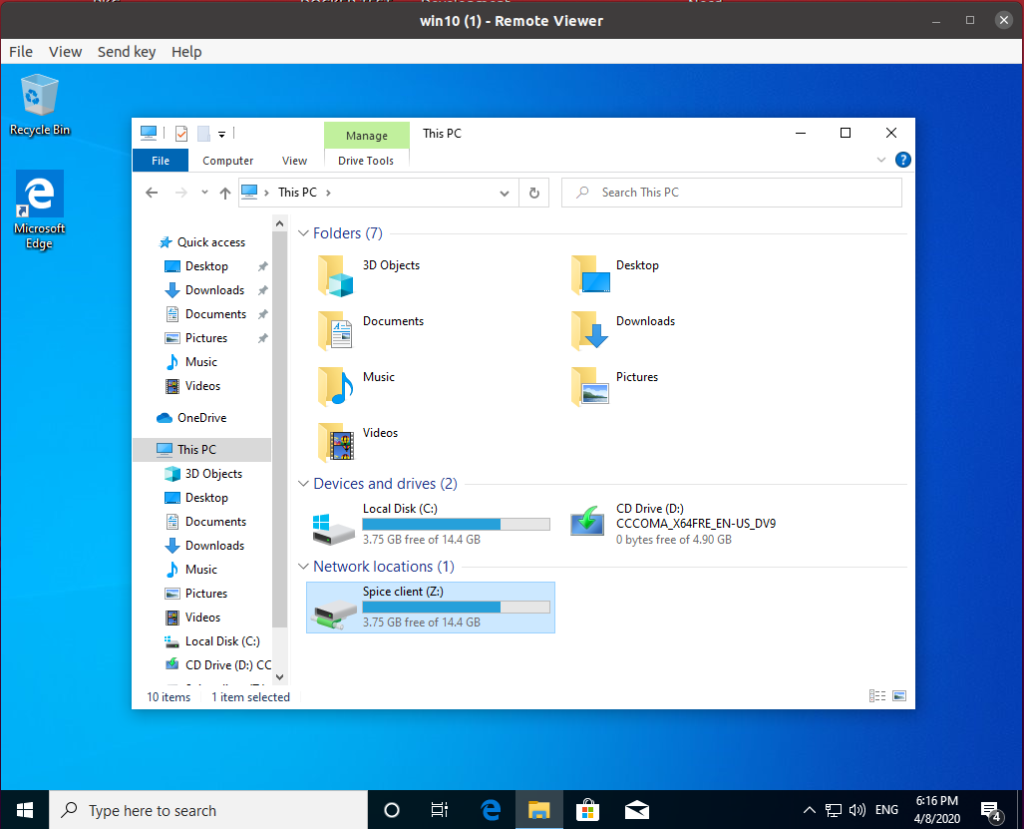
Try creating a file or folder and check shared folder on your Host to see if the changes reflected.
You are now done 🙂
Considering donating if you found my post helpful 😊
On the latest Windows 11. We need to install both Spice-Guest-Tools and Virtio-Win-Guest-Tools
Steps:
1. On the Windows 11 Guest, install this latest Spice-Guest-Tools from https://www.spice-space.org/download/windows/spice-guest-tools/spice-guest-tools-latest.exe
2. On the Windows 11 Guest, install this latest Virtio-Win-Guest-Tools from https://fedorapeople.org/groups/virt/virtio-win/direct-downloads/latest-virtio/virtio-win-guest-tools.exe
3. Reboot Windows 11 Guest
4. Enjoy
Thank you so much, this worked perfectly on my Linux Mint 22 with a Windows 11 Guest.
Salam tuan.
Terima kasih atas perkongsian ini. Baru tahu yang clipboard pun boleh ‘enabled’ untuk vm juga.
Izinkan saya berkongsi cara saya dapatkan perkongsian folder dengan ‘Windows guest’ ni tanpa cockpit yang saya muatkan di weblog saya; https://wraihan.com/posts/spice-webdav-kongsi-folder-windows-vm/
Cuma penulisan saya dalam bahasa Melayu.
Maaf lambat sikit saya balas komen. Banyak sangat spam sampai saya tak perasan ada komen ni.
Terima kasih atas pekongsian ya 🙂
Hi There
I tried your guideline and for the copy-paste, it worked like a charm. The shared folder, however, is not working. I got it all right till the last step. But the Windows machine does not have “spice-webdavd” in the list of the Task Manager. Any suggestions where the problem might be?
Thanks! Bart
Have you figured it out? I honestly haven’t use them for a while, so I cannot recall. If you want, I can try to install again and report to you what you (or I) might missed.
spice-webdavd is a service hence you wouldn’t be able to see it (running) shouldn’t the service be running itself. Go for “Services” tab and check.
Yeah I’m encountering this as well, there is no “spice-webdavd” service to start 😐
On Step 3, does yours look the same as mine?

Make sure “spice-webdavd” is installed in windows. Google it, download, install and restart the windows.
Can confirm that this does not work – no spice webdavd service in Windows taskmanager!
You need install spice wedav from https://www.spice-space.org/download/windows/spice-webdavd/
Out of curiousity, wouldn’t setting up shared folders in Samba do the same thing?
Install spice-webdavd Daemon (https://www.spice-space.org/download/windows/spice-webdavd/?C=M;O=A) and you’ll see that service
Betsy ih
No problem
hey, tried the copy-pasta solution using the spice-guest-tools… it worked like a charm… thanks for this article!!!
Glad to help 🙂
Hi.
Thanks for this tutorial, but at the second step 2 of “Folder sharing” I don’t have any VM appearing in the Cockpit window ?
(I mean, I don’t even have the button “import VM” nor “add VM”)
Hello,
If I launch my VM through Virtual Manager, I cannot select any shared folder.
Do I always have to use the webinterface?
Thanks,
Andrea
Hi. I have not play with these for quite a while, so I cannot remember. Sorry.
…
…
That’s a lot of extra steps for basic functionality. Even VirtualBox has bi-directional drag-and-drop. Has Spice team considered adding it? Is it difficult?
[…] How to Enable clipboard and folder sharing in Qemu/KVM on Windows Guest […]
it is not possible to install spice-guest-tools in windows-guest on linux-host because of “NSIS Error: Error launching installer“. I tried most recent version as well as few older versions…
Hi. I think something is wrong at your end. I have just tested this and I can install it perfectly fine.
Works fine for me on Fedora 34, thanks!
Thanks, worked like a charm very useful very important
Works like a charm! Is the only tutorial I have found with all step by step to share folders between windows guest and Linux host. (Arch Linux host / Windows 10 guest). The only thing is that only one shared folder is possible but anyway if you want to go from VirtualBox to QEMU for Windows guests, sharing folder is nowadays the only thing it is not as good as VirtualBox. Anyway this tutorial rocks!
Thank you!
This works great on Linux Mint 20.3, excellent tutorial.
Thanks!!
The shared folders works fine in remote viewer, but it does not work in the QEMU console. So do we have to use remote viewer in order to have folder sharing?
I notice your article comes to an end in remote viewer, with no mention of using QEMU in the console?
After much searching and trying and hair pulling, this worked perfectly for me. As a bonus, this was able to support displaying dual screens on WIndows guest. Much thanks.
No need to install Cockpit for this to work, just install virt-viewer and run
[…] Источник Sections […]
[…] Источник […]
[…] Источник […]
[…] https://virt-manager.org/https://www.qemu.org/docs/master/tools/qemu-img.htmlhttps://markontech.com/posts/convert-virtualbox-vms-to-qemu-kvm/https://dausruddin.com/how-to-enable-clipboard-and-folder-sharing-in-qemu-kvm-on-windows-guest/https://www.debugpoint.com/kvm-share-folder-windows-guest/ […]
I have the folder share working fine, but I have to re-share it every time I open virt-viewer. Is there any way to make the folder share setting in virt-viewer permanent?
Hello there,
Please help me, I used rocky Linux I run a vm via QEMU/KVM, I am unable to copy and paste. How can I go about it sir. Please I need your help. I am a beginner.
Sorry, but I don’t quite understand your problem. Isn’t this tutorial is to enable copy/paste feature?
[…] Картинка с сайта: dausruddin.com […]
[…] Картинка с сайта: dausruddin.com […]