Considering donating if you found my post helpful 😊

Depends on your usage, IPv6 might be an important feature to have on your server. Enabling IPv6 could be tricky if since the wiki is outdated. For Frantech/BuyVM, we will need to be using Stallion to enable it.
Problems
Their wiki is not completed and you might be struggling especially when your server don’t have /etc/network/interfaces file, which also mean your server is now using netplan.
If your are using Ubuntu 17.10 and later, netplan is now your network configuration tools by default.
Solution
Netplan is a neat solution which requires you to do some simple steps to get your IPv6 working.
Step 1 – Assign IPv6 to your server
Log into Stallion using the same credentials with Frantech Client Area, and select your server.
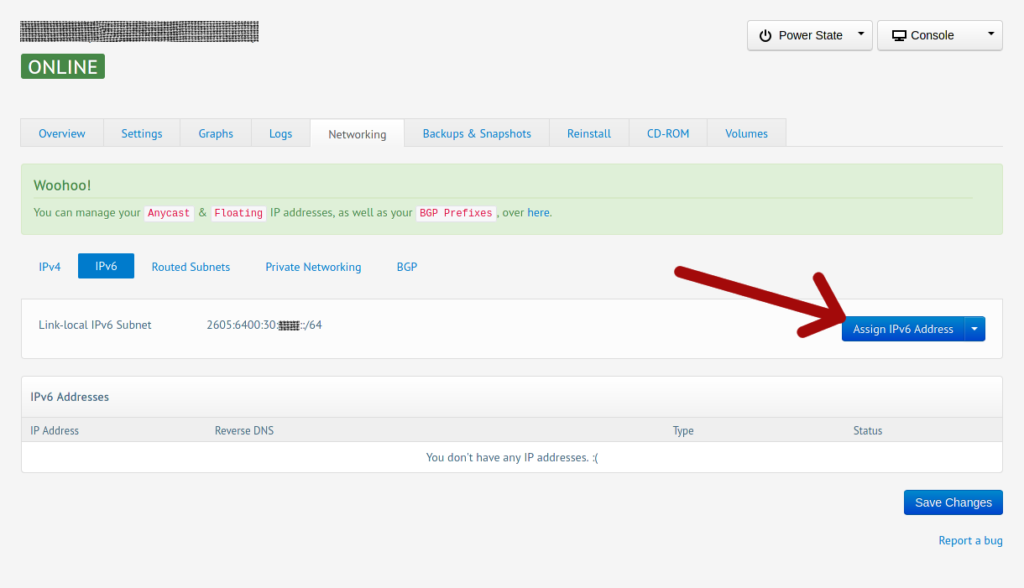
Go to Networking > IPv6, then click on Assign IPv6 Address.
Only fill the last input box with any compatible IPv6 character(s). For the sake of this tutorial, let’s fill it with number 1.
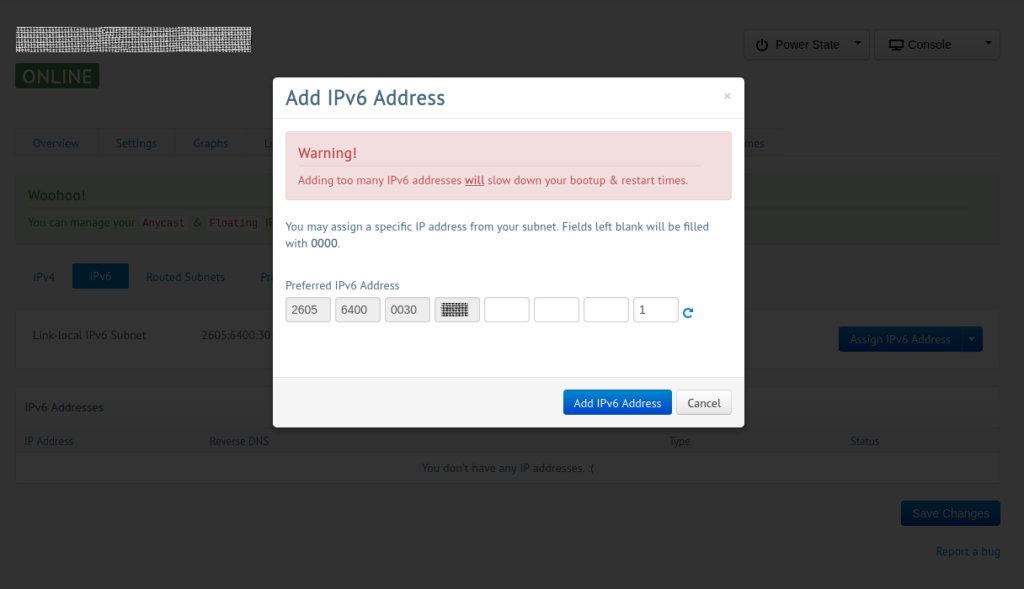
Click the blue button to save. You can repeat this multiple times to add multiple IPv6. I added 3 of them with incremental number.
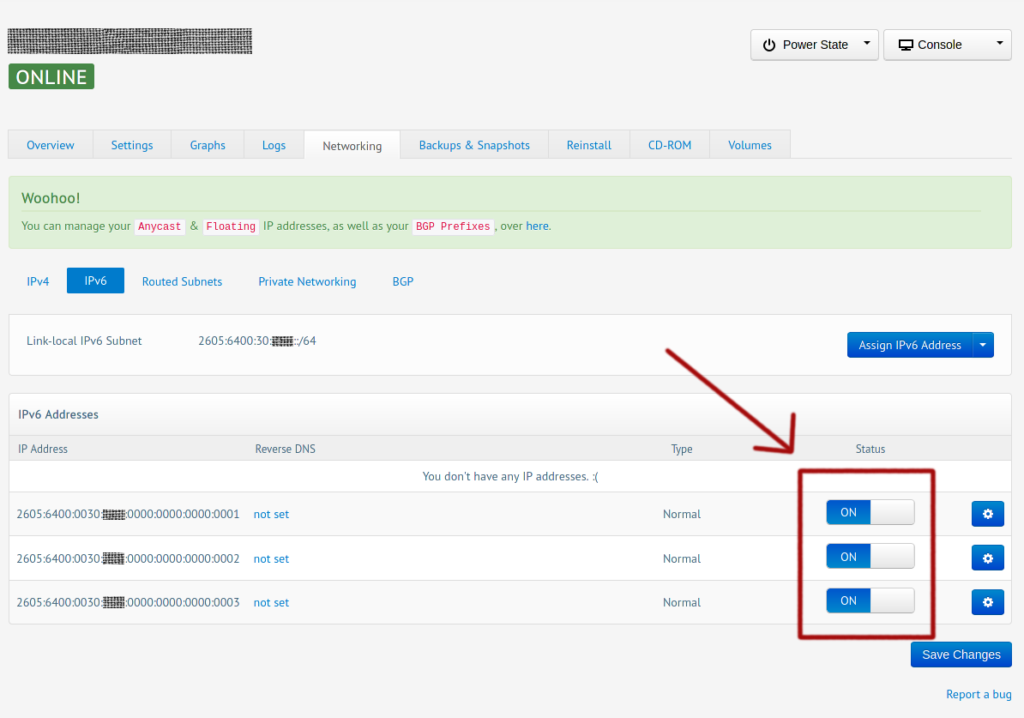
Now, turn the switches on, and Save Changes
Step 2 – Modify netplan configurations
On your server, edit file /etc/netplan/01-netcfg.yaml
By default, you are going to see something like this:
network:
 version: 2
 ethernets:
   eth0:
     dhcp4: true
Edit it to be like this
network:
 version: 2
 ethernets:
   eth0:
     dhcp4: true

     # Configuration for IPv6
     dhcp6: no
     addresses:
       - 2605:6400:30:xxxx::1/48
       - 2605:6400:30:xxxx::2/48
       - 2605:6400:30:xxxx::3/48
     gateway6: 2605:6400:30::1
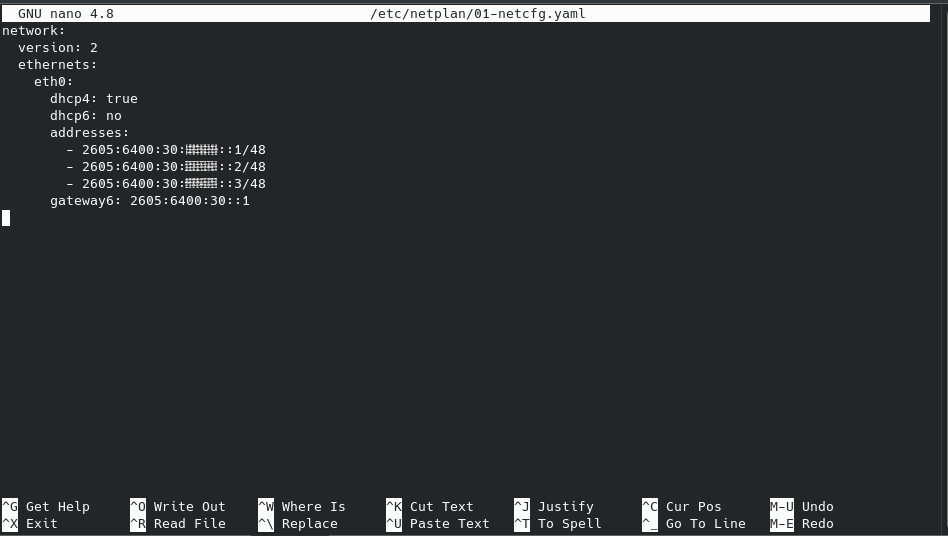
- dhcp6 – The value should be no. This will tell netplan that we want to manually configuring IPv6 instead of relying on DHCP (which wouldn’t work).
- addresses – This is where you specify your IP addresses that you added earlier in Stallion. Edit the example to your own IP addresses. /48 prefix is required on every single IP.
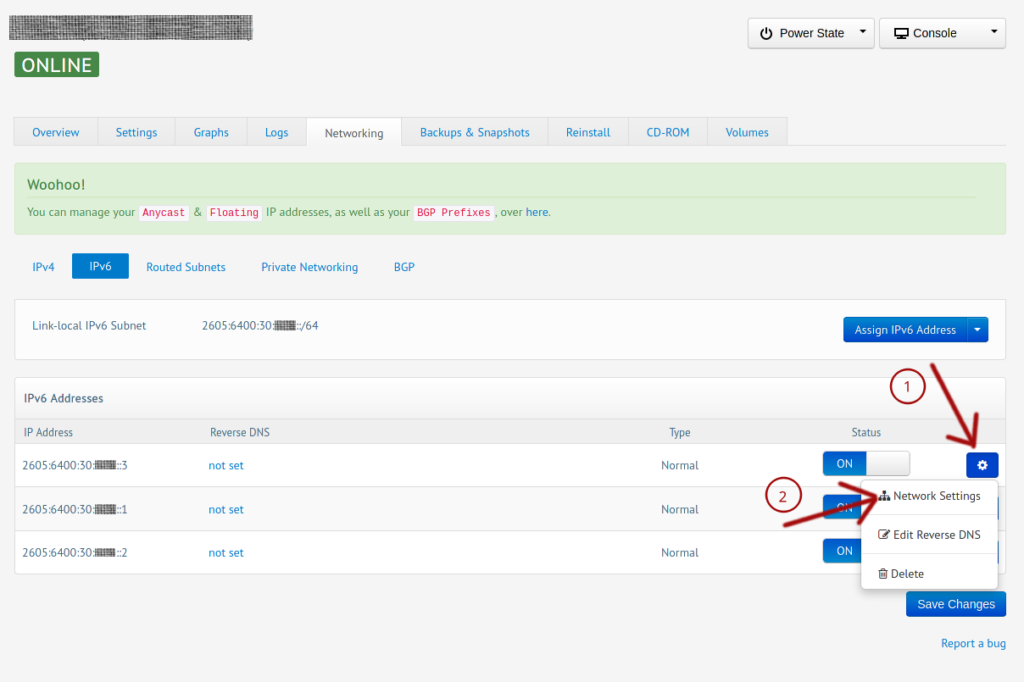
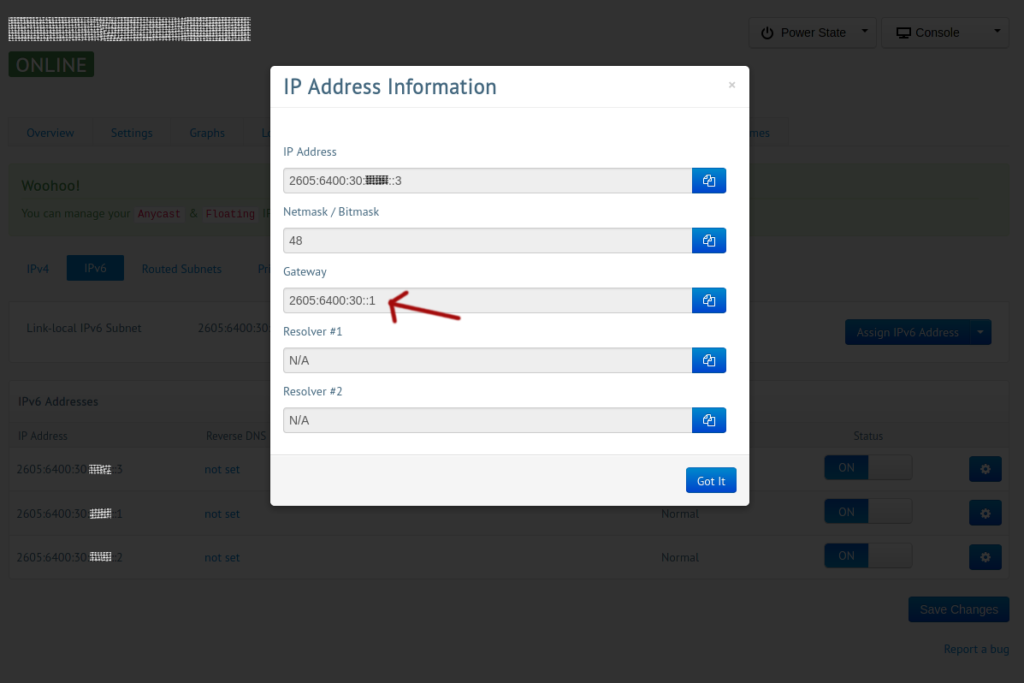
- gateway6 – Depends on your location, it will be different between them. In this example, I have my server in Luxembourg. If your server is in different location, check your gateway by clicking gear icon next to any newly added IPv6, then select Network Settings.
Your netplan configuration should look like this.
After saving the edit, apply your new netplan configuration
$ sudo netplan apply
You will be disconnected for a few moments.
If your are not, don’t panic! You can still connect to your server using Console feature in Stallion.
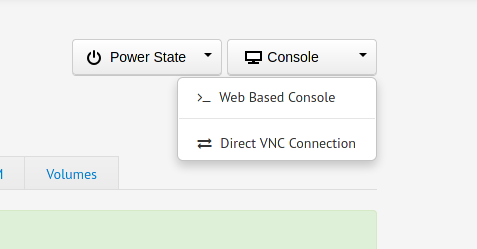
Just click on Web Based Console and log into your server using same credentials. You can then revert the changes or troubleshoot of any mistakes. make sure to apply your netplan configurations after every final changes.
Step 3 – Verify it is working
To make sure everything is working, ping an IPv6 hostname or IP.

and your $ ip a should look like this
1: lo: <LOOPBACK,UP,LOWER_UP> mtu 65536 qdisc noqueue state UNKNOWN group default qlen 1000
   link/loopback 00:00:00:00:00:00 brd 00:00:00:00:00:00
   inet 127.0.0.1/8 scope host lo
      valid_lft forever preferred_lft forever
   inet6 ::1/128 scope host
      valid_lft forever preferred_lft forever
2: eth0: <BROADCAST,MULTICAST,UP,LOWER_UP> mtu 1500 qdisc fq_codel state UP group default qlen 1000
   link/ether 00:16:8c:f2:a2:a6 brd ff:ff:ff:ff:ff:ff
   inet 107.xxx.xxx.xxx/24 brd 107.189.30.255 scope global dynamic eth0
      valid_lft 2586045sec preferred_lft 2586045sec
   inet6 2605:6400:30:xxxx::3/48 scope global
      valid_lft forever preferred_lft forever
   inet6 2605:6400:30:xxxx::2/48 scope global
      valid_lft forever preferred_lft forever
   inet6 2605:6400:30:xxxx::1/48 scope global
      valid_lft forever preferred_lft forever
   inet6 fe80::216:8cff:fef2:a2a6/64 scope link
      valid_lft forever preferred_lft forever
Considering donating if you found my post helpful 😊

Thanks for this post! I used it to set up a single ipv6 address on my buyvm instance. There wasn’t much useful info on their site, but it’s a discount VPS, so I can’t complain.
gateway4, gateway6 are deprecated.